Tuesday, March 11, 2008

Teriyaki Chicken - western style

I decided to try my hands on some western food without having it fried. Hubby and I are starting to worry about eating too much oily/fried/outside food.

Not too sure if the western food I prepared was healthy though, but I just told him that no oil was used :) So he was pretty happy.

Introducing... Teriyaki Chicken, Mashed Potato and Caesar Salad!


Ok, I bought the Caesar salad :) It was from Cold Storage. At first, I was quite skeptical about it, but while preparing it, I took a bite and then took lots of bites more :p I had bacon bits so I sprinkled them on the salad too! Heavenly!


Teriyaki Chicken - directions

1) Marinate 3 chicken thighs with 6 tbsp of teriyaki sauce
2) Place in fridge while preparing the mashed potato
3) When the potato has finished boiling and is ready to be mashed, take the thighs out and grill them at 200 degrees celsius for 40 minutes, turning them over after 20 minutes

Mashed Potato - Sufficient to feed 4 (or 2 very greedy us)

Ingredients
4 potatoes
a pinch of salt
10 tbsp milk
generous portion of bacon bits
pepper

Directions
1) Put potatoes into a pot of water (completely covering them) to boil sprinkling a pinch of salt
2) Boiling should take about 30 mins or when chopsticks poke through to the core of the potato
3) Drain the potatoes out and run them under tap water
4) Thereafter, start mashing the potatoes. For me, I used a mighty normal FORK :)
5) Start adding the milk tablespoon by tablespoon and incorporate it into the mashed potato*
6) Sprinkle pepper to taste and heaps of bacon bits and savour!

* I like the texture of my mashed potato with 10 tbsp of milk. So you might want to add the milk in tablespoon by tablespoon so that you can stop once you are satisfied with its texture

R's Verdict? Yummilicious! Though the potato was indeed too much for 2 greedy people :p

Labels:

Wednesday, January 02, 2008

Claypot Chicken Rice

R couldn't believe himself when he had spent 30 bucks just to buy the ingredients to cook claypot rice.. until I had to tell him that things like the dark soy sauce, light soy sauce, sesame oil, chinese wine, rice etc etc could be kept and used in the future, then it dawned on him that it made a little sense. *phew*


Introducing Ruth's Claypot chicken rice (in a rice cooker!)
Boneless chicken legs and fillets cut into about 20-30 small bitesize pieces
2 chinese sausages
Handful of chinese mushrooms, soaked in warm water for 20 minutes
1 tb sesame oil (I didn't put any sesame oil as I bought a bottle without realising I needed a bottle cap opener *duh*)
2 tb chinese wine
2 tb dark soya sauce
1 tb light soya sauce
Handful of lettuce, shredded into long strips
1 cup of rice & slightly over 1.5 cups of chicken stock (as my rice was still quite hard though cooked)

1. Marinate chicken thigh meat with the sesame oil, chinese wine and soya sauces. Put in fridge while preparing the rest of the ingredients

2. Remove stems from mushrooms & slice in half

3. Slice chinese sausages into thick slices (like the picture above - thick!)

4. Boil the rice in rice cooker. After 10 minutes (approximately - What I do is I open the rice cooker off and on to see how cooked the rice is), open rice cooker & add chicken thigh meat. Be sure to flick off excess marinade before putting meat in. Then, add the chinese sausages and mushrooms on top. Close the rice cooker and allow the cooker to finish cooking the rice.

5. In the meantime, I baked an egg until a bit golden brown with my turbo boiler to accompany the lettuce for the rice to sit on. It was the first time and it came out just like those eggs they serve for Nasi Lemak! Yums

6. Viola! Stir up the rice & all the ingredients and serve immediately on a bed of shredded lettuce. I opened the cooker and stir the ingredients and put it to cook again for a 5 more minutes. The result? A bit of burnt rice just like authentic claypot rice!!

R's Verdict? Good!

Labels:

Monday, June 05, 2006

Western Delights

I decided to whip up something special this weekend in order to keep my cooking enthusiasm going and at the same time to use up some leftover ingredients from my previous cooking attempts. (how do you use up all your leftover ingredients??)

So I surfed all around the internet for some interesting recipes to try out! Well, I found a few recipes that sounded pretty interesting and yet seem easy to prepare... So the menu was set
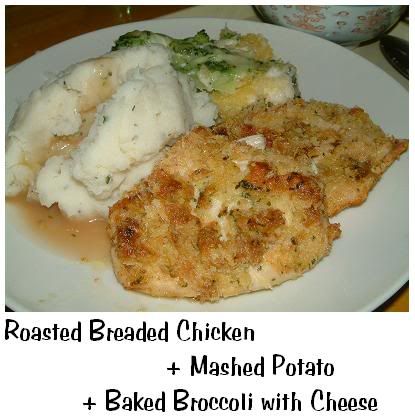
Main: Breaded Chicken Roast with mashed potato & baked broccoli with cheese
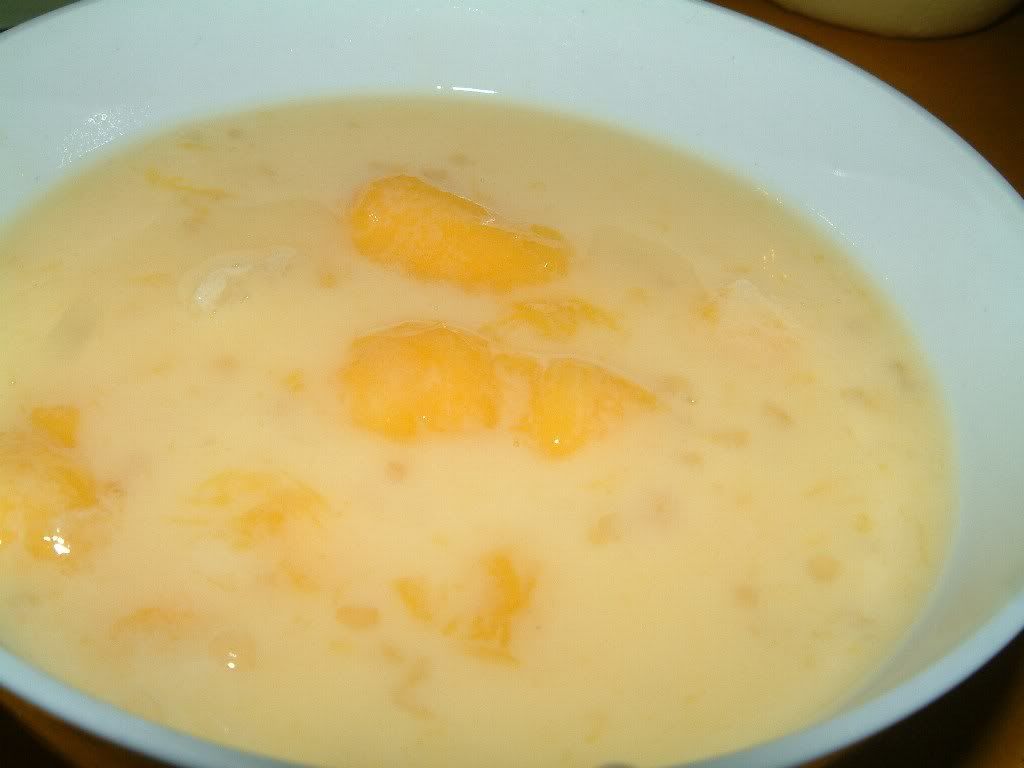
Dessert: Chilled Mango Sago

But lo and behold!! It was my first tedious try at making a meal! okay, I admit... I was feeling a little lazy tired... it probably is simple for some of you who are seasoned chefs and have prepared even more complicated meals before though :)

I got the breaded chicken roast from here but was rather hesitant as no one posted a review on the recipe. I started to turn a little skeptical ~ (maybe it was never tried before? maybe it isn't that fantastic? maybe no one bothered? hmmm) ~ The recipe was also submitted without a photo so I really had no idea what to expect of this dish. It was really a dish that required me to "imagine". So, I went ahead with the recipe on hand and a backup sidedish of mashed potato.

[Well, if the chicken failed then at least the potato would suffice in filling our tummy, right?]

And the result?

I felt rather proud of my first try!


Basically, the breaded roast chicken was better than I had imagined, my recipe-less mashed potato was quite successful and the baked broccoli with cheese was something unique and delicious! Though I have to confess that I hurried down to the supermarket to buy a packet of instant roast chicken gravy as I was worried the potato would turn out bland :)

Breaded Roast Chicken (adapted from Nigella.com/submitted by symphony0509)

Ingredients:

3 or 4 pieces chicken breasts/thighs

4 heaped tbsp of butter

4 cloves of garlic minced finely/blended

1/4 cup cheese (well, I used cheddar cheese that has been grated)

1 handful of coriander leaves (I didn't have any fresh leaves but had some masterfoods ready coriander leaves spice so I added approximately an amount of my palmsize)

2 splashes of virgin olive oil

Crushed graham crackers (I used my leftover panko)

the original recipe also included 1 tsp of lemon juice and 1 tsp of thyme leaves but I didn't have any on hand thus didn't add them in :)

Directions:

Season the chicken with salt and pepper and place it in the electric turbo boiler

Mix well the olive oil, coriander leaves, cheese, garlic, butter, lemon juice and thyme into a bowl

Paint the chicken generously with the mixture

cover the chicken with the panko until completely covered

Baked it for about 45mins to an hour with a temperature of about 150degrees

Recipe-less mashed potato (based on my agar-ation)

Ingredients and Directions:

4 potatos, skinned

Boil the potatoes for about an hour or until soft

Wash them under cold water and drain it

Place in big bowl/plate and start mashing them with a fork

When potato has been mashed totally, add about 1/4 cup milk or until mashed potato has a smooth texture

Season with salt and pepper together with basil leaves

Add about 1 heaped tsp of butter

Mash further and mix well

Baked Broccoli with cheese

Took the broccoli recipe from here except for a few modifications...

firstly, i used my muffin foil instead of aluminium cups and as I didn't know how to estimate the weight proportions, I basically used 2 broccoli stems with each cup, 1 tsp of mayo, 1/2 tsp of butter and enuff cheese to fill the top and cover with it with leftover panko again :)

I placed it in my trusty turbo boiler for about less than 10 mins till the top turned light brown at about 120 degrees

And for dessert, I have to admit that the sago almost drove me nuts! I soaked it for eons and it didn't turn translucent! It stuck to each other like glue and by the time I thouroughly read through the recipe again, then I realised there was an easier way!! argghh!

But definitely a recipe worth trying! Definitely doesn't taste as pale as it looks. I placed it in the freezer and by the time it was to make its appearance, it had bits of ice in it which made it a great finale to my weekend cooking experiment :)

Chilled Mango Sago (slightly modified from thelazychef & Zu's Kitchen)

Ingredients:

1 mango (original recipe uses 2 but I was on a tight budget)

400ml mango juice

125ml evaporated milk

80g sago pearls

250ml water

2 tbsp sugar

1 tbsp cornflour

1 tbsp water

extra 100ml water

Directions (slightly modified as I was lazy tired):

1. Used 250ml hot water and sugar, stir till sugar dissolves.

2. Mix cornflour with 1 tbsp hot water and pour into the syrup and stir until smooth.

3. Cut the sides of the mango and cube them.

4. Scrap the remaining mango and put in a bowl, add 100ml of water to blend, put aside. (I confess I skipped this step. Instead the remaining mango went into my stomach and upon slurping it all up I realised I was to use the remaining mango as well)

6. Add blended mango (from4), cubed mango, mango juice and evaporated milk into the syrup solution (from 2) then stir.

7. Add sago pearls and stir, if too thick, add abit of cooled boiled water or more mango juice.

8. Chill before serving.

As I had a tedious time preparing the sago pearls and have thus lost track of the time I took to prepare them...
Please refer to original recipe and preparation of sago pearls here :)

Labels: , ,

Monday, May 29, 2006

Japanese Fare

I has been 3 weeks since I started on my cooking "experiments" and I must admit that it gets a little addictive at times. The urge to try out something new is always on my mind and I can't help it but to constantly surf around for new recipes to whip up in the kitchen.

Though I have yet to satisfy any cravings (well, I am a potato chip junkie so I can always buy my favourite Calbee Hot and Spicy chips off the shelf), it still brings great satisfaction seeing the food I try out turn out successful and well, platable.

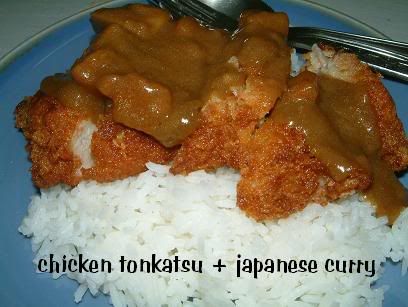
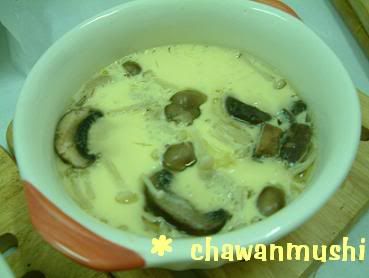
I made it a Japanese themed week as I tried out Tonkatsu chicken with japanese curry, chawanmushi as well as green tea ice-cream with red bean paste. Of course with the Tonkatsu chicken and chawanmushi recipes taken from ruth's website :) Her zeal for cooking and her clear instructions make her blog a definite visit for me everytime I go online!


CHICKEN TONKATSU (adapted from ruth)

Ingredients:
1 cup of Panko (leftovers from what I bought from a Japanese supermarket and its different from tempura flour)

1 egg, beaten

3/4 to 1 cup of flour (I used leftover self raising flour from my muffins) and I think 3/4 cup of flour would be sufficient as there was lots of leftover when I used 1 cup.

2 boneless chicken thigh meat (as the pieces were too big, I cut them into 4 pieces)

Directions:
1) Season the meat with salt and pepper (me, having not seasoned anything before.. I added about 5 dashes of pepper and 2 dashes of salt and it tasted pretty ok)

2) Cover the meat in flour, dredge it in egg and cover the meat in panko in this order, ensuring that all parts of the meat is covered (and as ruth suggested to have a production line with these 3 ingredients lined up together so it facilitates the meat to go from flour to egg to panko easily)

3) Refrigerate for an hour (this is to allow the breaded layer to stiffen and stick to the meat)

4) Heat up the oil and wait for the oil to be ready (well, I used a dangerous method of placing my arm over the oil to see if its hot enough :) but for ruth she waited till she saw small bubbles rising and waited for another minute) and deep fry meat till golden brown

5) I also steamed hot a packet of ready mix golden curry for about 5 minutes and poured it on top of the chicken before serving


CHAWANMUSHI (adapted from ruth)

Ingredients:
2 eggs, beaten

3/4 to 1 cup chicken stock (well, I used chicken soup that my mum was boiling) If you like your chawanmushi watery, 1 cup of stock will be nice but if you prefer it less watery, you can try 3/4 cup

1 tbsp sake (but I used chinese wine from my mum's kitchen)

1/2 tbsp soya sauce

1/4 - 1/2 tbsp sugar (I found 1/2 tbsp sugar a bit too sweet so I guess 1/4 should be just right)

I added some mixed mushrooms I found from the supermarket

Directions:
1) Mix all the ingredients together and pour into container but do not cover the container as it allows the chawanmushi to set and cook faster

2) Boil water in steamer till very hot and lower the chawanmushi into the steamer and put the fire to low to allow egg to set smoothly

3) I steamed my chawanmushi for a good whole 30 mins

GREEN TEA ICE CREAM WITH RED BEAN PASTE

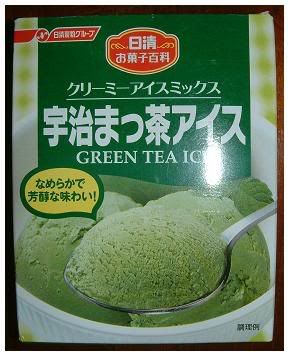
Well, I found this at Medi-ya a few weeks ago and the picture was just so tempting! Though the actual ice cream I made out didn't look that presentable (well, thats why I didn't put up any pictures), it tasted rich and milky and really really nice!! I bought a packet of ready made red bean paste found at Medi-ya as well and it complemented the green tea ice cream!!

Though the instructions were in Japanese, I could sort of decipher the ingredients as well as the proportions by looking at their pictures behind the package :)

Directions:

1) 1 egg yolk beaten

2) 3/4 cup milk

3) Add the green tea mix and mix well till all dissolved and freeze for about 3 hours

Labels: , ,

Monday, May 22, 2006

Tandoori Chicken

My first try at cooking a meal... thanks to ruth's wonderful trusty & easy peasy recipe for tandoori chicken and Zu's kitchen for the strawberry yoghurt ice cream. Though, I can't help but to admit that I surfed all around to gather recipes to make the 1kg tub of yoghurt sitting in the fridge to good use :)

I had wanted to try out the saffron rice but was afraid to do so, despite spending 10 bucks on a small mini container of red stringy like herb. Questions were running thru my mind.. would it stain my rice pot? will my mum scream if she realises her pot turns a funny yellow? will my guests like the smell/taste of saffron rice? Will normal sugar do instead of brown sugar? I guess I would be more adventurous and try it out the next time round :)


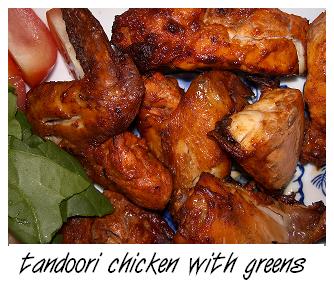
My guests loved the tandoori chicken! Though it was eaten with plain rice, we finished an entire chicken. Just the 3 of us.

The tandoori was so tender because of the yoghurt and when coupled with nice sweet tomatoes, it was even more tasty! I guess I could have tandoori for the entire week :D

After meal dessert was strawberry yoghurt ice cream but I guess I was over enthusiatic with the yoghurt as it was a tad too sour. Plus, I bought strawberries that were also sour (oh well, they were cheap as well and probably not in season). And because I was so eager to try it and yet afraid it will melt, I took a few pics that turned out blurrish and have thus not posted them up

Thank goodness my guest came with cheesecake as a backup plan so after the yoghurt ice cream we induldged in some strawberry new york cheesecake and oreos cheesecake!


INGREDIENTS and DIRECTIONS for TANDOORI CHICKEN (adapted from ruth's website)

About 1 small spring chicken (well, I cut it up into 8 pieces so I could associate with ruth's recipe)

Marinade chicken

with 3 full tablespoons of plain yoghurt (I must admit I just took 3 scoops.. didn't matter if it was slightly more and over heaped)

and

3 slightly heaped tablespoons of "sharwood's tandoori spice mix" and added it according to the color of the marinade and to ensure all parts of the chicken was covered

And place it in the fridge overnight

Well, I do admit that the yoghurt does really tenderise the meat! *yummy!*

the tandoori chicken was grilled for about 30 mins including flipping it at about 200 degress inside the good ol' trusted electric turbo boiler :)

Labels: